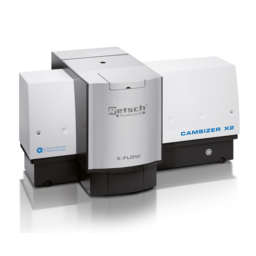
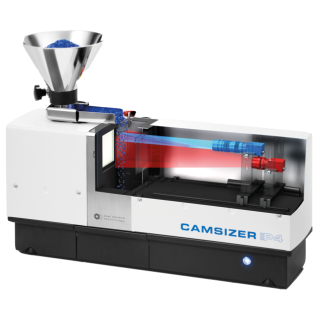
CAMSIZER X2
Scientific Product
Assistant Buniness Unit Manager : Miss. Rotsukon Chanseeharat
Tel : 081-988-2819
E-mail : rotsukon@pico.co.th
Admin
Tel : 02-939-5711 ext. 611
E-mail : scientific@pico.co.th
The quality control of fine powders can be substantially improved with the new CAMSIZER X2: More precise and faster analysis of particle size and particle shape helps to improve the product quality, reduce rejects and save labor costs, energy and raw materials.
The design of the CAMSIZER X2 is based on the well-proven optical particle measurement system Camsizer but is optimized for finer samples (from 0.8 µm to 8 mm). Not only the improved optical resolution but also new options for material feeding allow for an extended application range. Fine particles tend to agglomerate which makes it difficult to record the properties of a single particle. Therefore, it is important to have various possibilities of feeding the sample to the analysis area to be able to find for each material the optimum between the desired dispersion of the agglomerates and the undesired destruction of the individual particle.
The CAMSIZER X2 offers the flexible X-Change system: from the X-Fall module (free fall mode), which is the most gentle method for the material, to the X-Jet module with adjustable pressure and variable nozzle geometry and, additionally, the X-Flow module in which particles are dispersed in liquids, optionally by an ultrasonic probe.
Application Examples
abrasives (medium-size and small grit), activated carbon, cement, chemicals, construction materials, detergents and enzymes, foodstuffs (pulverized and granulated), glass beads, metal and ore powders, pharmaceutical powders / granules / fine pellets, plastic fibers, plastic powders, salts, sand, sugar, wood fibers, …
Product Advantages
- Digital image processing with patented two-camera-system (acc. to ISO 13322-2)
- Wide dynamic measuring range from 0.8 µm to 8 mm (extended measuring ranges available
- Newly developed optical system with ultra-strong LEDs for highest resolution and excellent depth of sharpness
- Reliable detection of smallest amounts of “undersize” and “oversize”
- Very short measurement time of 1 – 3 minutes
- Modular system X-Change for dry and wet dispersion
- Measurement results are 100% compatible to sieve analysis if required
- Intuitive software
- Several language versions (German, English and other languages)
- Detailed particle size analysis – results are saved in more than 1,000 size classes
- Simultaneous analysis of particle size, shape, number, density and transparency
- No-contact, non-destructive measurement
- Calibration in seconds
- Simple handling prevents operating errors
- Password protectet instrument settings
- Automatic measuring procedure
- Robust design, insensitive to dust and vibrations
- Self-cleaning, wear-free, maintenance-free
- Less time- and labor-intensive than sieve analysis

